
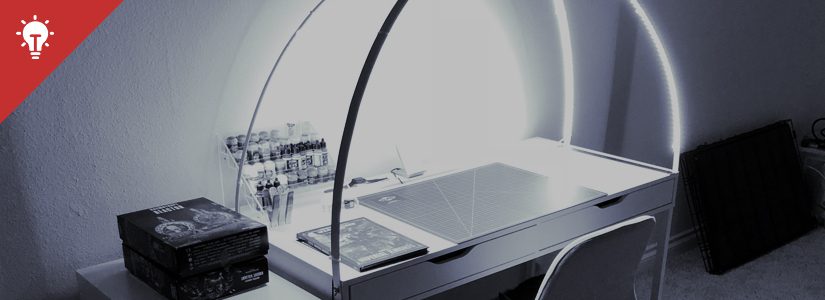
Looking to upgrade your painting area with a new light setup? Today, Shane shares how he went about building an LED Arch-Light setup for his IKEA desk! Strap yourself in, it’s a long read but really cool results…
Things You’ll Need
Everything you’ll need was purchased from Amazon.com, Lowes, and Ikea. If you do not have a Lowes near by you should be able to find most everything at a local hardware store, except maybe the Aluminum flat bars. You don’t need to follow everything I have done to a T, instead use this tutorial as a guide line and adjust as you go depending on your own tastes and needs. Please be sure to send any comments/ corrections/ thoughts or comments, so we can make sure this tutorial stays up to date and includes only the most helpful information!
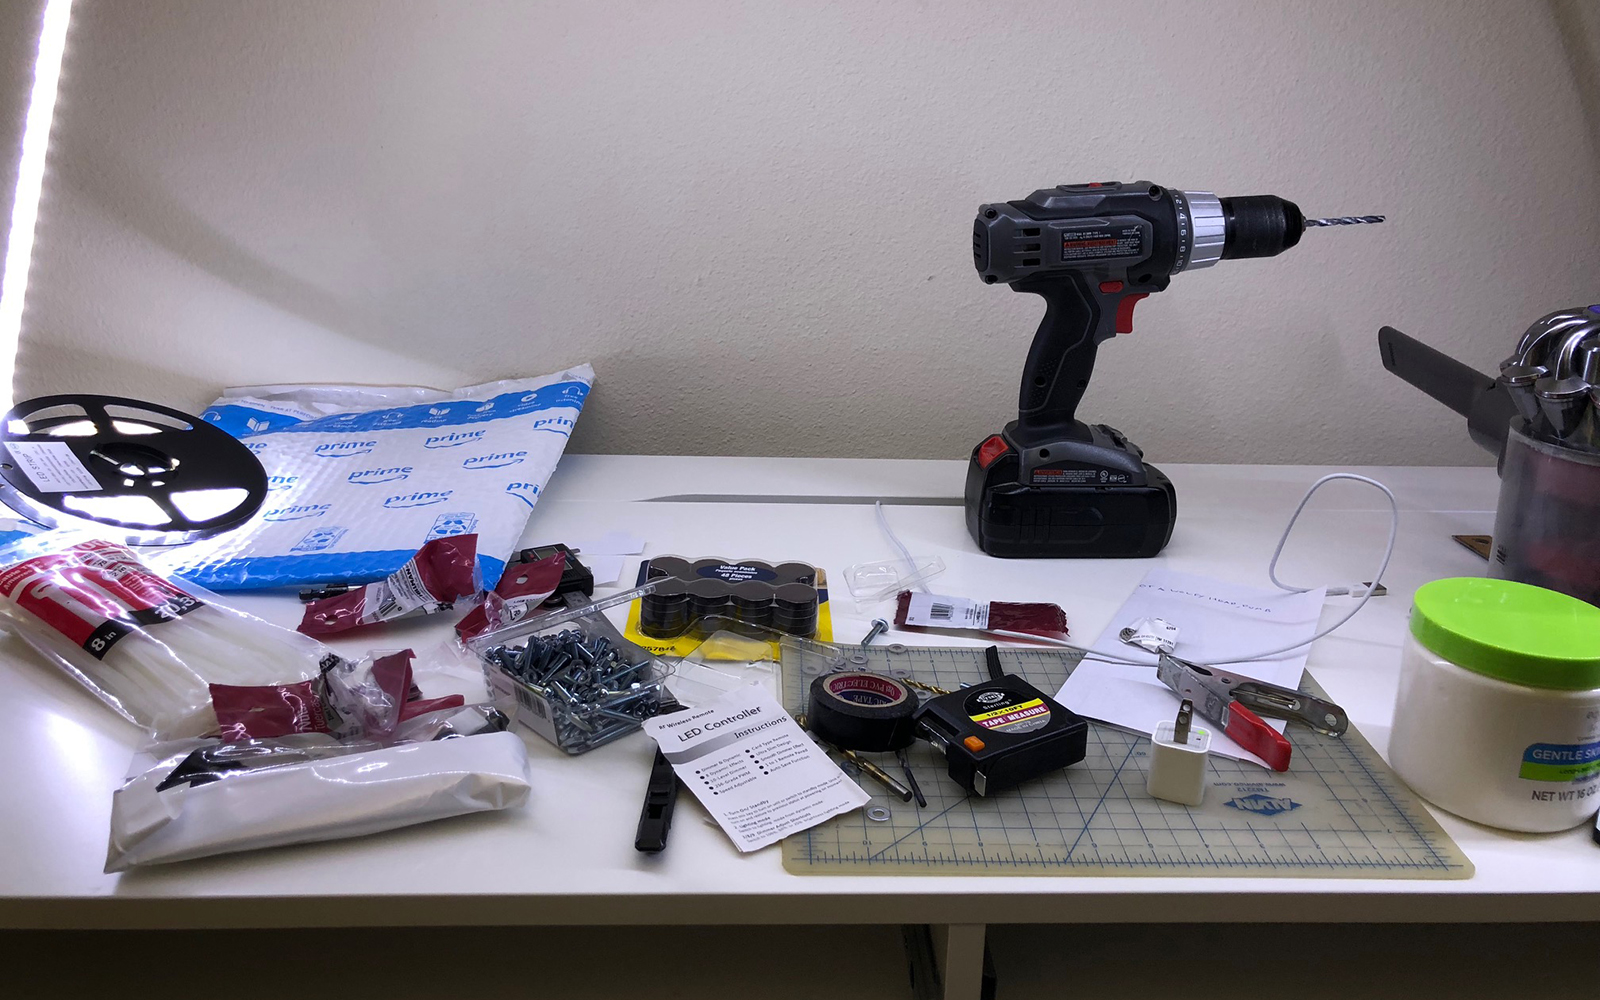
Tools
- Tape measure (To measure the length of your aluminum bars, and where to drill holes in the desk)
- Sharpie marker (To mark on the aluminum bars, and desk where you need to drill the holes)
- 7/32nd Drill bit (To drill through the sides of the desk, in order to mount the aluminum bars to the desk)
- ¼” Drill bit (To drill through the aluminum bars. I wanted to make these holes slightly larger than the holes in the desk, in case I misaligned something I’d still have enough play to feed the screws through the holes )
- White spray primer + paint (Up to you if you want your aluminum to be bare or not. My bars were pretty gnarly looking when I got them so a nice coat of paint definitely helped)
- Metal hack saw (I didn’t actually use one, since I liked the length of my bars, but it would come in handy if you wanted to trim your bars down in order to lower the height of the arch)
- Masking tape (or other tape that will allow you to temporarily hold things in place/ mark where to cut/ etc)
- Multimeter (You don’t NEED one, and I didn’t use one but it would have helped quite a bit! Use this to test faults in your electrical set up)
- Center punch (To more easily start your drilled hole on the aluminum bars)
- Optional: At least 1 cat (To get in your way, and silently judge you as you fail to successfully build your light arch)
Amazon
- LED strip connectors, 3ft length, 5 pack. (These are to connect the separate runs of LED lights together, without having to solder them. If you have a soldering iron and wire and are comfortable with soldering low voltage electronics, you can skip these)
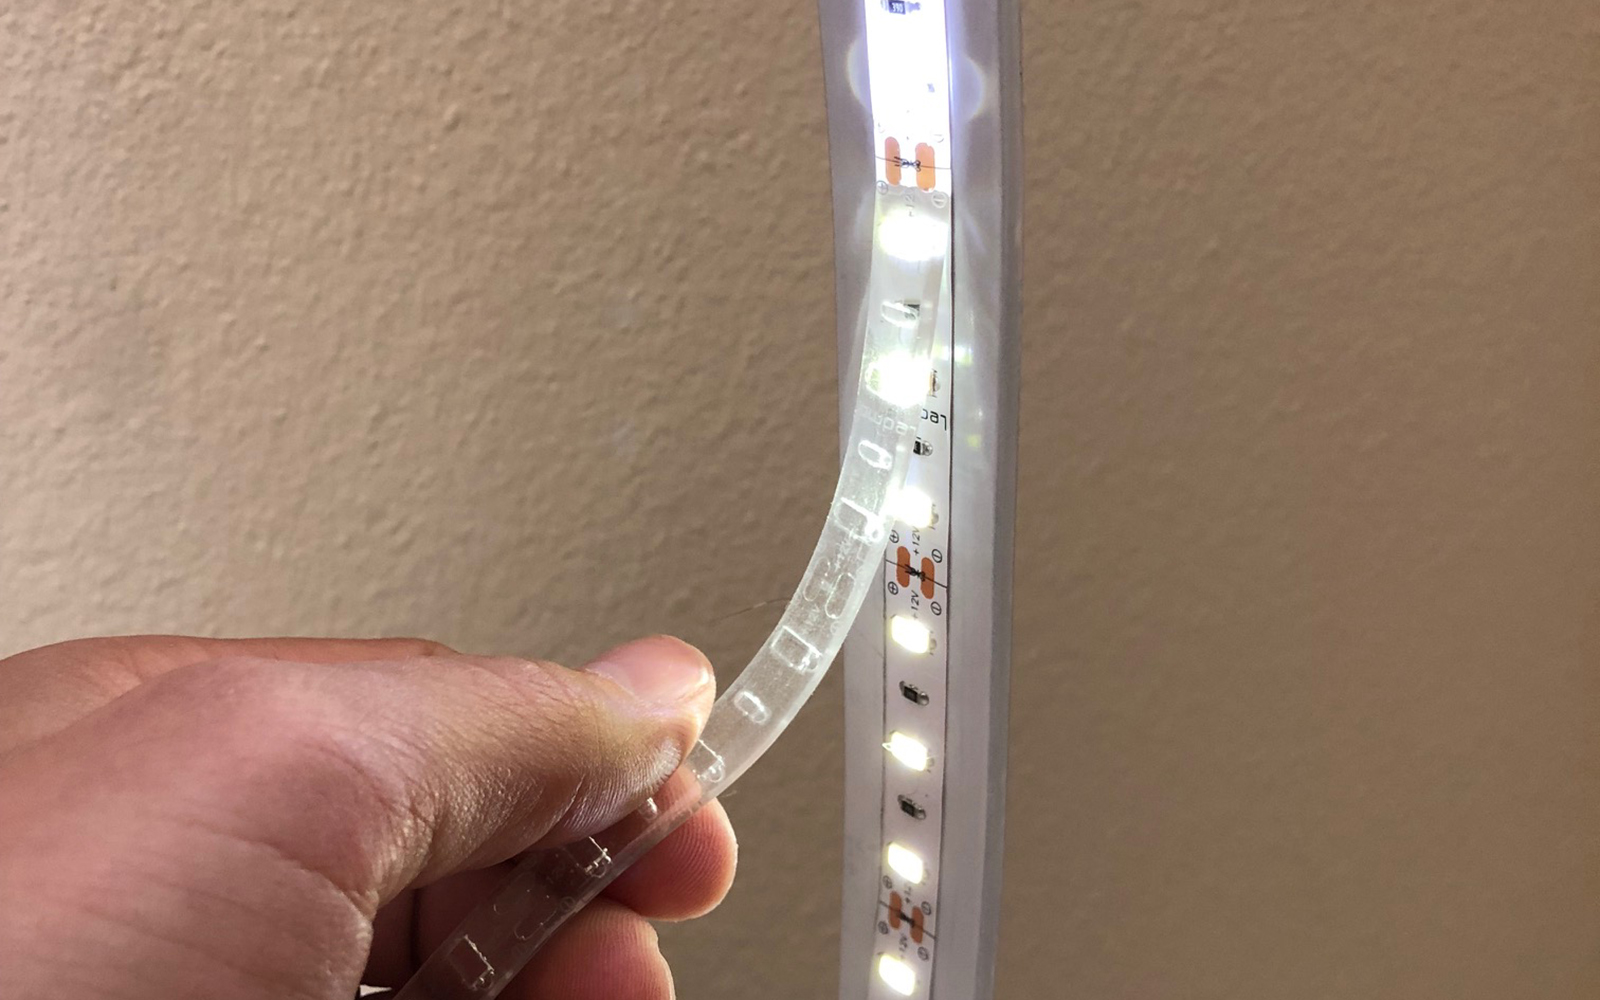
- 16 ft of 5630 Daylight LED light strips, NON-WATER PROOF. (I accidentally purchased the water proof version, but the silicone water proof sleeve actually makes the light look VERY BLUE. I ended up peeling off the water proofing, and the lights look great. Because of this, I’d save yourself the trouble and simply purchase the non-water proof version!)
- 12V driver for LED strip. (This is the driver that was suggested to go along with the LED strips, and will power the entire 16ft spool)
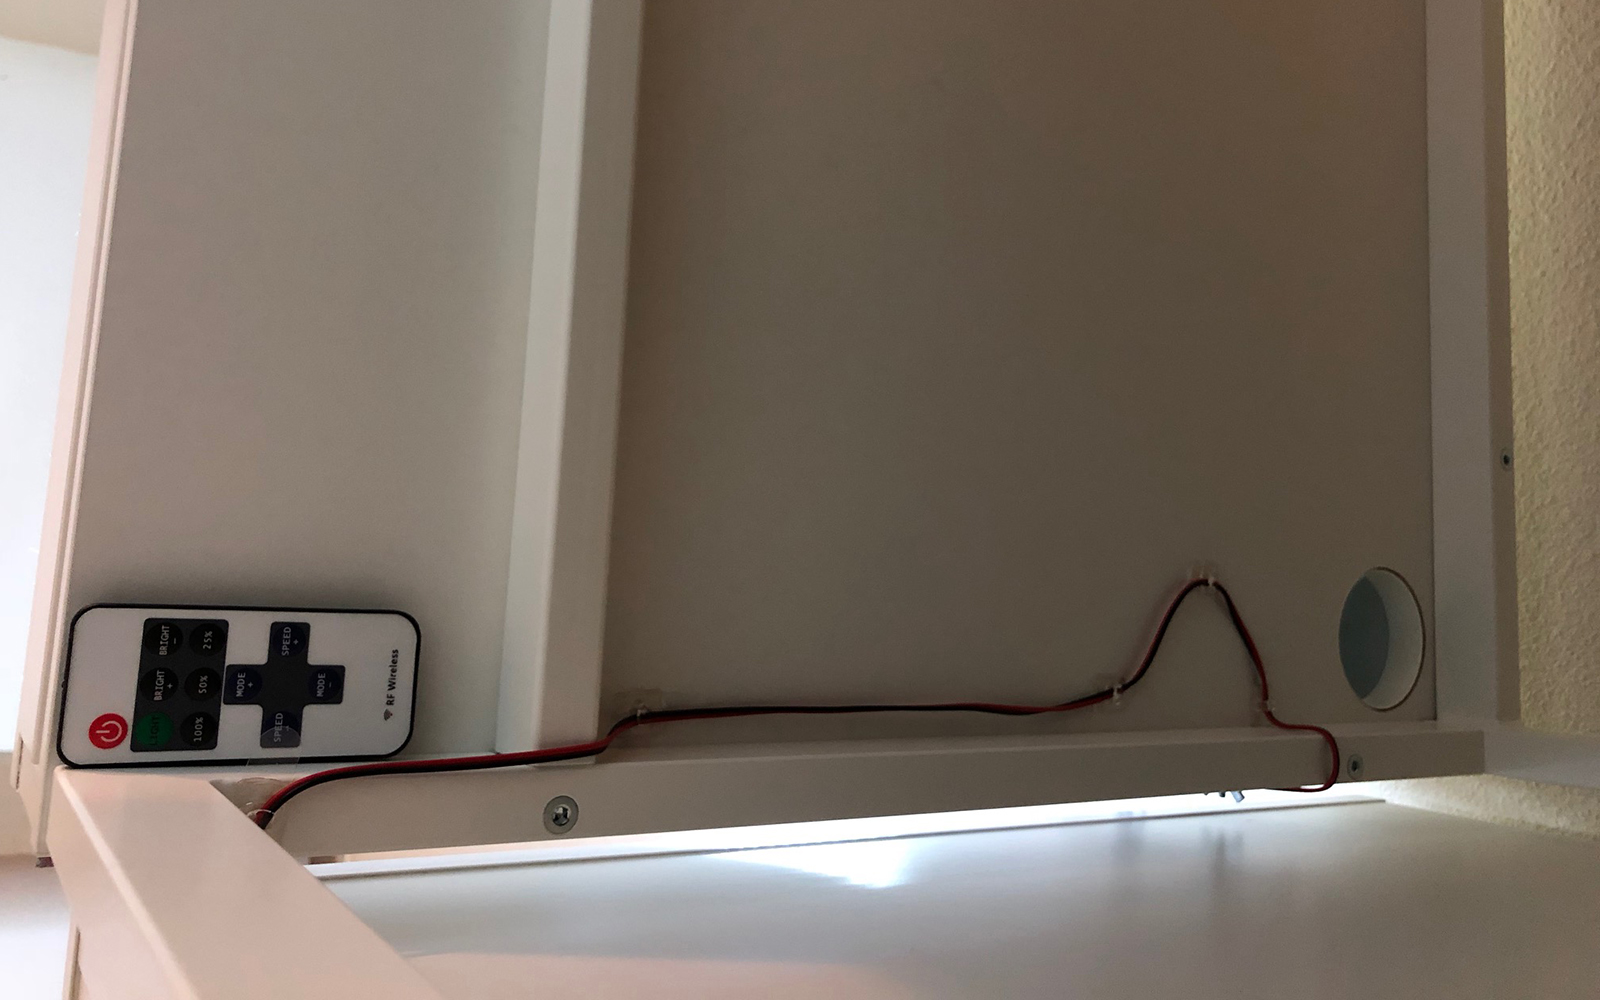
- Remote control dimmer. (This is the remote that was suggested to go along with the LED strips. This remote allows you to easily turn your lights on and off, and dim them)
- Zip ties. (You don’t need these specific ones, but this is a good bundle of all different sizes for a nice price. I would suggest white if that’s the color you will paint your arches)
- Velcro strip. (to stick the remote control to the bottom or side of the desk)
- Surge protector, 2 pack. (Stick it in the desk, and then plug in the LED light driver/ cell phone charger/ etc)
- Command Decorating clips. (With these you will be able to shorten wire runs, and help hide them on the side and underside of the desk for a clean look)
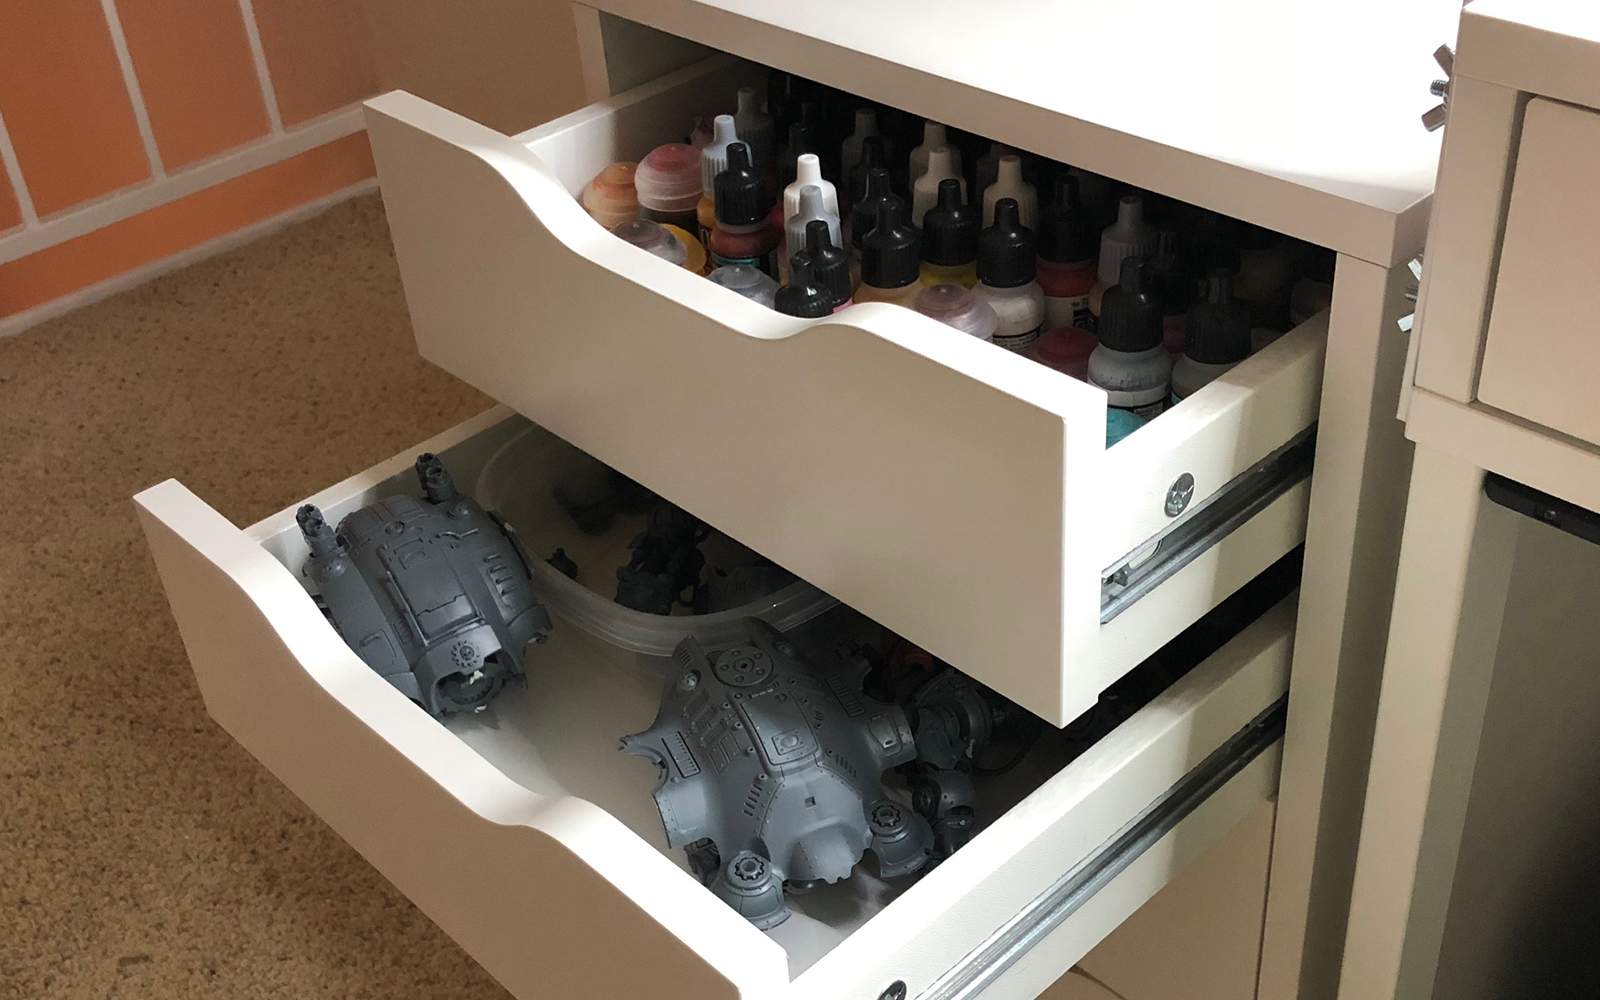
- Sparco Drawer Organizer, 2 pack. (These are perfect for paint brushes and are just the right height to fit in the drawers)
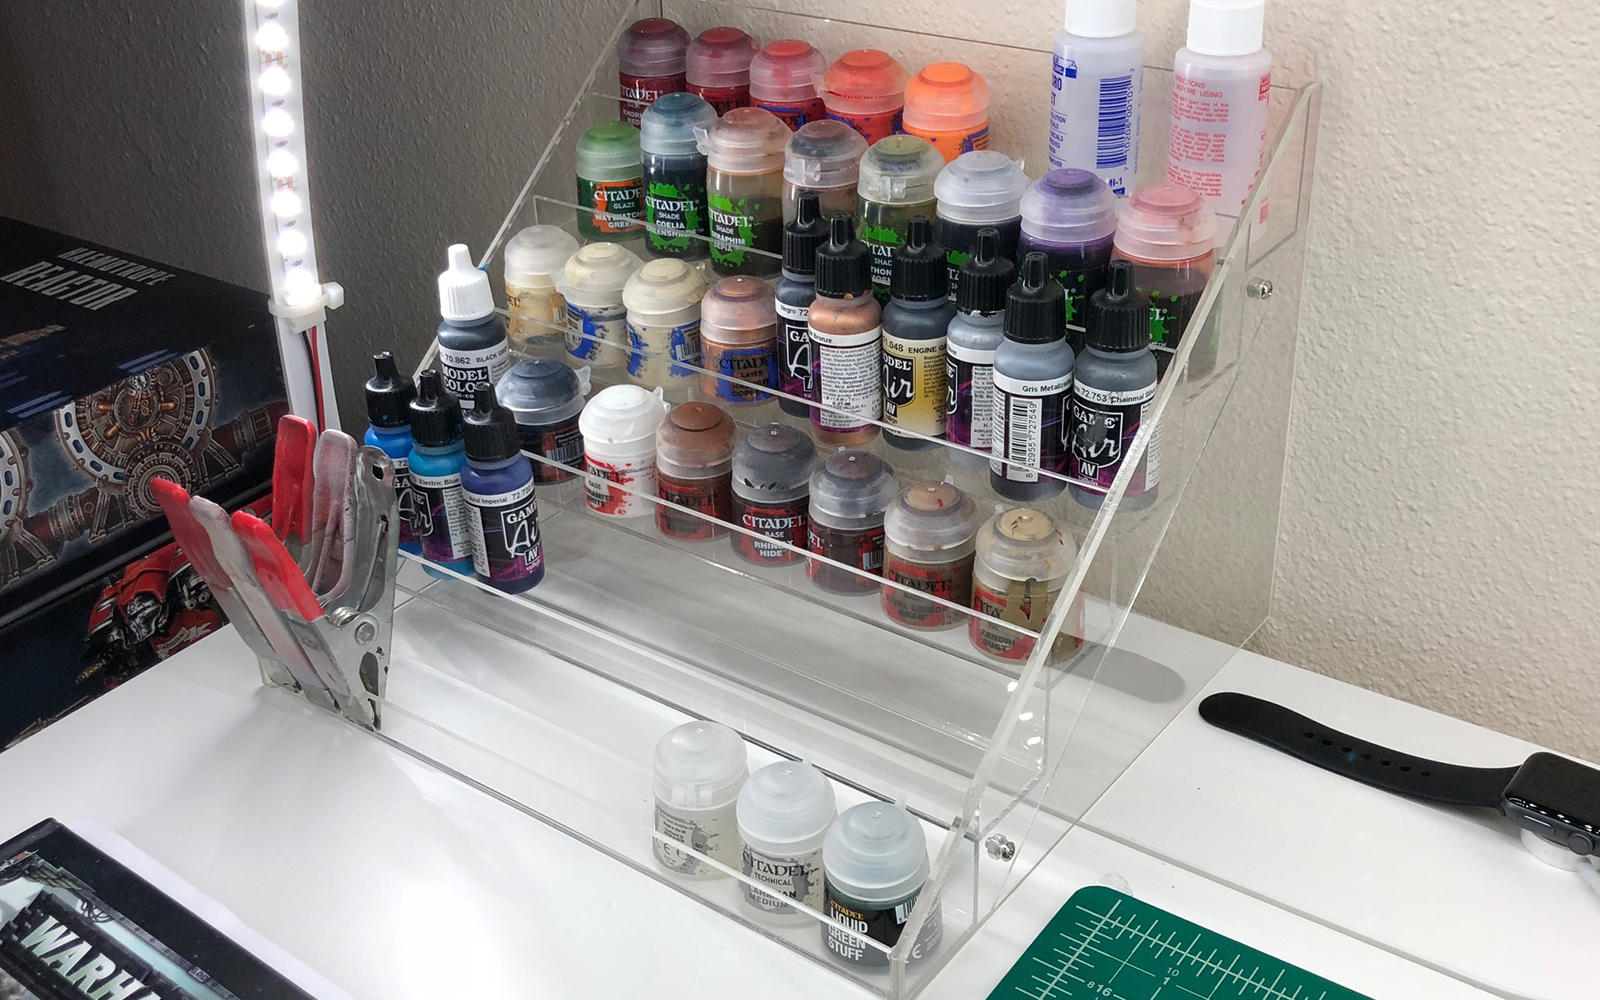
- Alvin 18×24 cutting mat. (For not ruining your new setup)
- Clear Acrylic Nail Polish Display. (Holds GW and Vallejo paints very well)
Lowes
- Hillman #8 to 32 x 1-1/4” Machine screw, 8pcs. (You will need 9 pcs total for this, so buy two packs. These are for attaching the peak of the arch together, and then also attaching the arch to the desk)
- Hillman #8 to 32 Wing Nuts, 3pcs. (You will need 9 total, so buy 3 packs. These are for attaching the peak of the arch together, and then also attaching the arch to the desk)
- Blue Hawk 100-Count #8 x 7/16” Flat Washers. (You will need 9 total… So you’ll end up with quite a few left over! These are to stop the machine screws from ripping their way out of the inside of the IKEA desk, I also added a few to where the two arches meet up top)
- 8’ long, 1” wide, 1/8” thick Aluminum bars. (You will need two bars total. This will act as the substrate your lights will be attached to, you can go wider than this, but I wouldn’t go any thinner as the arches will feel fimsy)
IKEA
This is for the desk itself. Also included is the chair I picked out, and a little side cabinet which is not required for this build, but works out well.
- Alex desk (Comes in three colors, I liked white)
- Alex drawer unit
- Langfjall chair (Comes in a bunch of colors, I liked beige)
Assembly Instructions
Still with us? Good!
Now that you have a shopping list to work with, it’s time to build everything!
Building the Desk
First things first, assemble the IKEA desk according to the instructions included. There are only two steps that need your attention when assembling the desk itself…
- You do not want to permanently screw the sliding drawers into place! If you do this, you won’t be able to attach the aluminum bars to your desk!, wait until the light arch is fully assembled and tested before securing the drawers to their metal sliding arms. I didn’t end up screwing mine permanently into place, as they are held in well using friction alone, plus this way I can just pull the drawer all the way out if I ever need to get inside
- You should make sure to adjust the hinged door at the top-back of the desk, so there is a nice gap between it and the desktop once closed. This will let you run cables out from inside the desk, without pinching them!
Building the Arch
Now that you have the desk itself built, you will have a much better idea of the overall size of the assembled light arch…
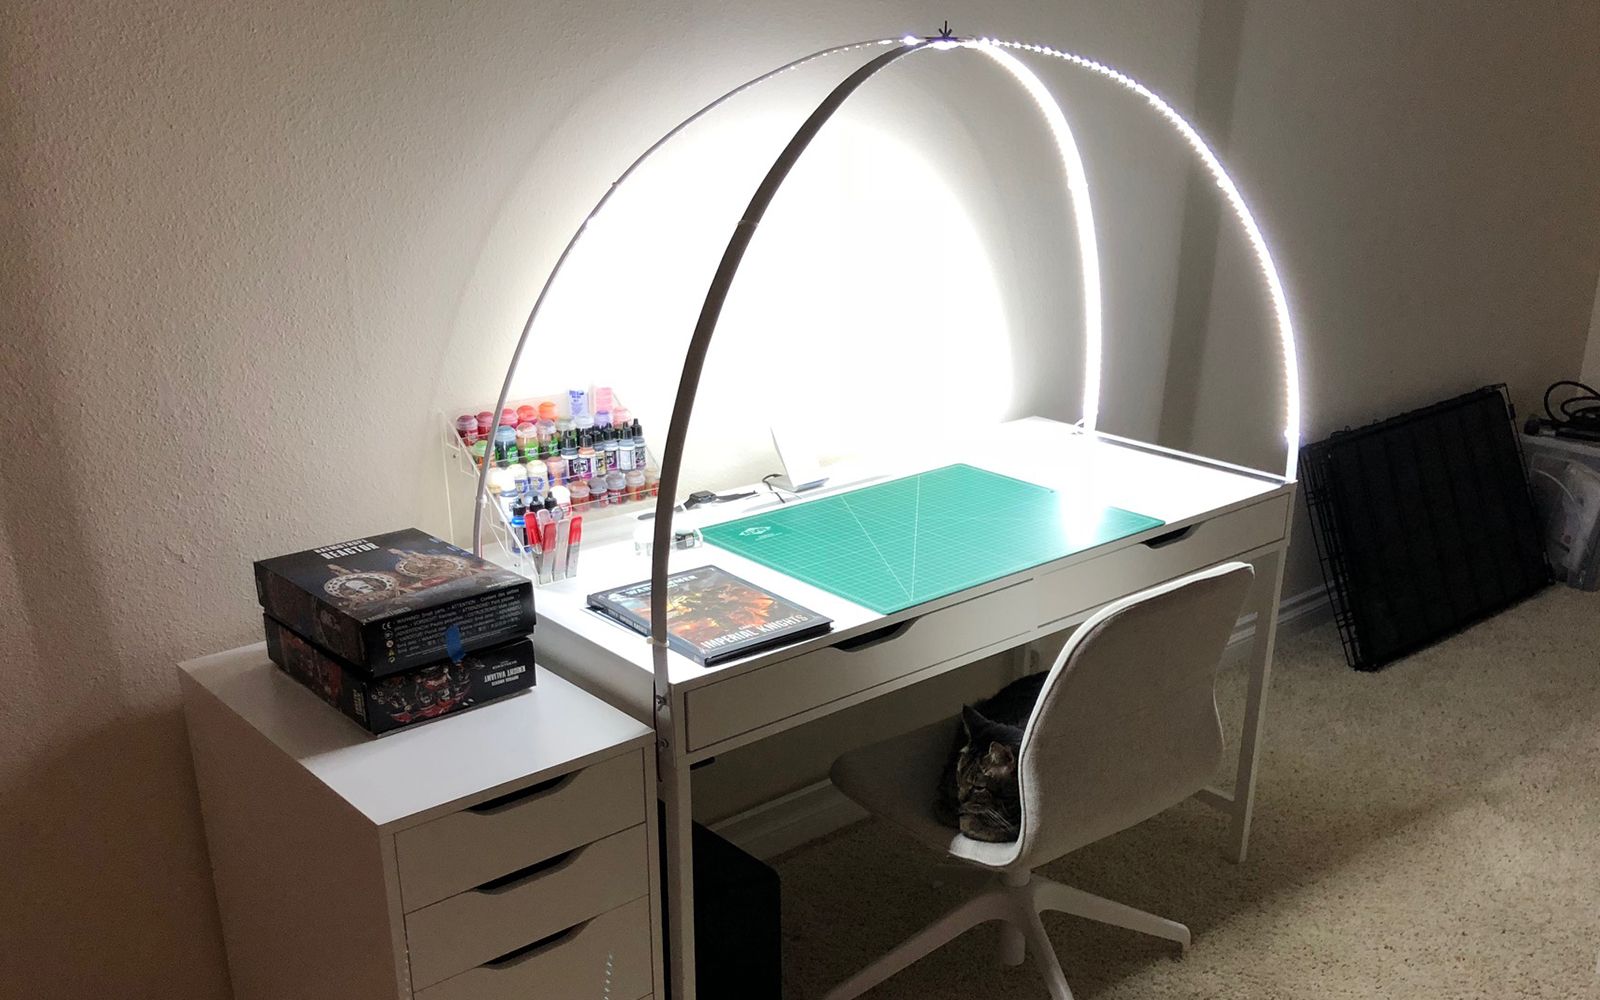
- I did NOT end up cutting my aluminum bars to length, instead I used them at their stock 8’ lengths. The way my light arch is assembled there is just under 28” of vertical space from the peak of the arch, down to the desk top. After putting it together I realized that it’s much taller than it needed to be, but by that time I had already drilled the holes and painted it! If you’d like to make the peak of the arch shorter, remember that each far end of 4-1/2” of the bars will be mounted flush to the SIDES of the desk!
- How did I figure out how tall to make the Arch? I laid the desk down on the floor, on top of a piece of cardboard (see image below). I then drew a straight line on the cardboard, perpendicular to the table top, which represents the peak of the arch. I then did sketched with a sharpie an arch shape, that I would then use as a template to bend the aluminum. With the peak about 28” tall, you end up needing the bars to be just under 8’ in length. As mentioned above, this is pretty tall, though I don’t need to worry about hitting my head! (Might also work well for a Warlord Titan!)
- You will need to drill 5 holes into each bar of aluminum. One hole in the middle of the arch, so both arches can be bolted together, and 2 holes on either end of the bar so that they can be bolted to the desk.
- The middle hole is easy, as you take your overall bar length and divide it in two. The holes on the far ends of the bars and are only slightly more difficult to figure out. You will need to drill one hole 1 1/4” away from the end of the bar, and another hole at 3 ½” up from the end of the bar. Repeat this on all 4 bar ends. All holes should be centered on the bars width.
- For the aluminum bars, I used a slightly oversized drill bit (1/4”), this way in case the drill bit walked around on the surface before biting, I wouldn’t run into issues trying to align them to the holes I would soon be drilling into the desk’s sides. Alternatively, use a center punch!
- Now that all holes have been drilled Its time to bend the bar into the arch shape
- Lay the bar down on the ground. I placed my foot in the center, and pulled up on the bar every few inches, gingerly working your way from one end of the bar to the other to essentially add 10’s of tiny bends across the entire length. If you are able to consistently add enough bends the effect will look more like an arch, and less like 100 sharp angles! You don’t need to bend this all in one go, I suggest working your way back and forth a few times to slowly shape the arch.
- Now that you have something that probably looks less like a perfect arch and more like a question mark, lay it down on top of your cardboard template. Gently and incrementally bend the arch so it matches the template more or less. Once the entire thing is bolted together it will be forced into a pretty nice arch shape anyway, so it does not need to be 100% perfect at this point.
- Now that you are done bending both bars into arches, hit them with a few coats of paint (If that’s what you’d like to do) I laid mine both down, hit the tops, bottoms, and one side, let it dry for 15 minutes, flipped it and repeated until the white paint covered (somewhat) consistently. I was very impatient and now mine has drips on it. I suggest that you do not follow my path and instead dedicate a window of a few hours to paint up the arches to avoid over applying the paint.
- Let them sit for a few hours after the last coat is applied. I used a quick dry paint, and it was actually dry within about 15 minutes of the last coat, but I didn’t want me apartment to smell like paint, so I let them air out for about 3 hours.

Drilling holes into the desk’s sides
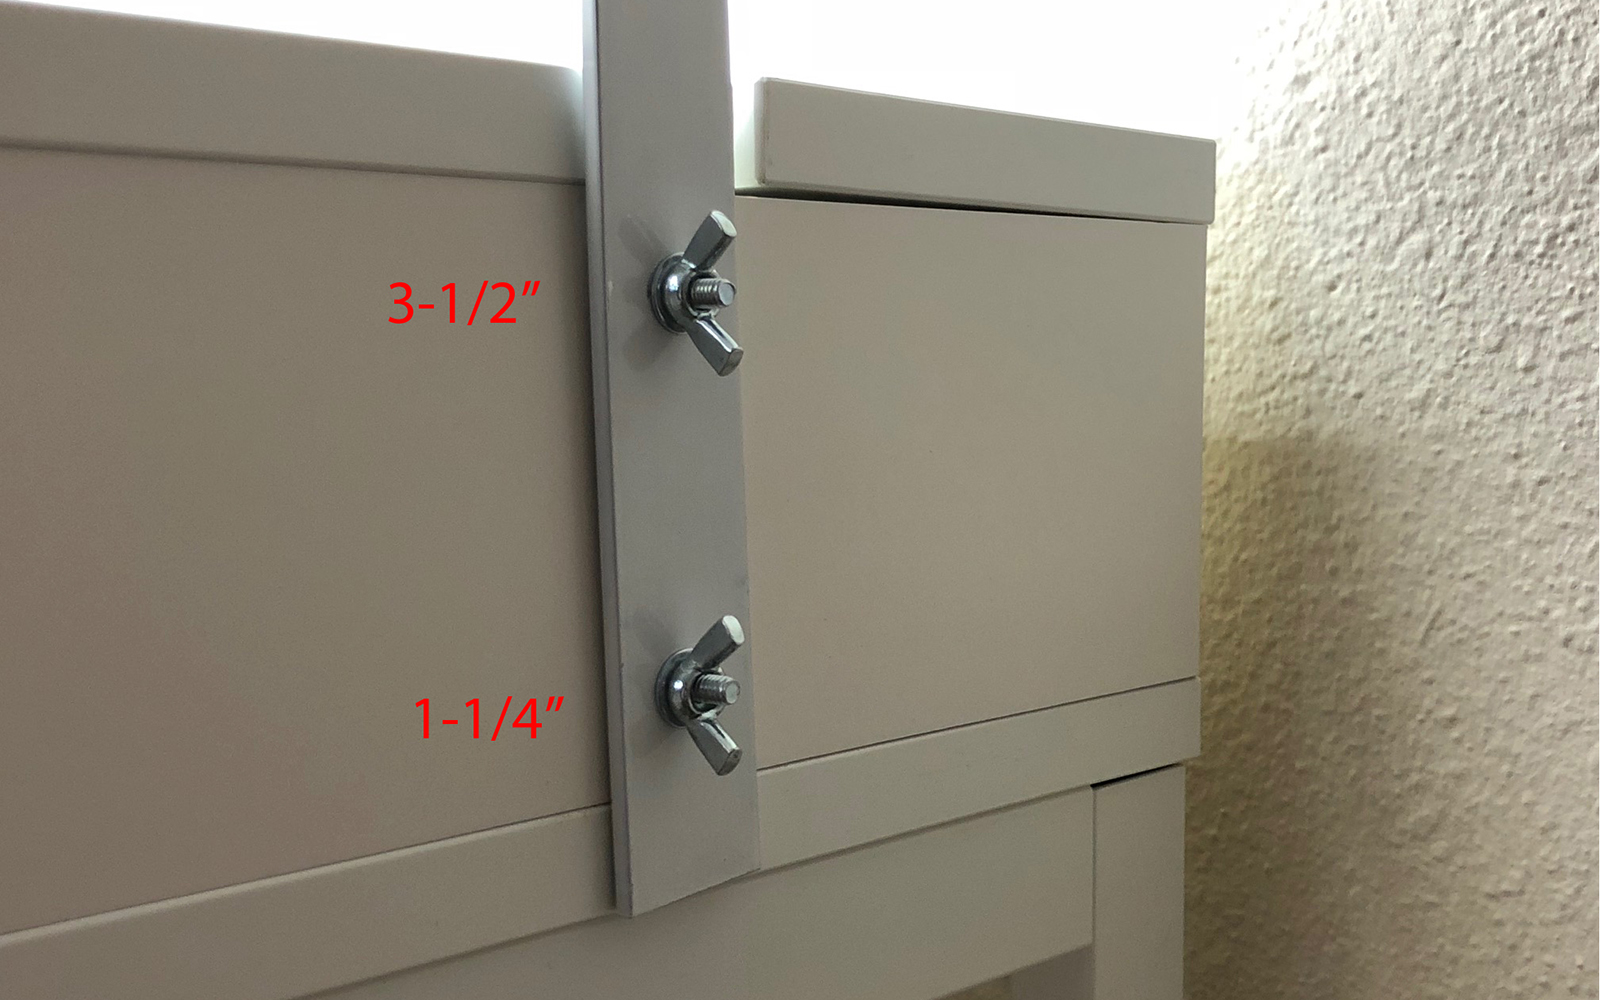
- To find where to drill the holes nearest to the FRONT side of the desk, mark one hole 1 1/4” up from the bottom edge of the desk, and another hole 3 ½” up from the bottom edge (see image below). Do the same on the other side of the desk as well. By placing the bolts in these spots, you will avoid interfering with the operation of the drawer slider. NOTE The way I drilled the holes here means that when the drawer is pushed back into place the front edge will catch ever so slightly on the heads of the screws, this was OK with me because I have cats, and I figured the extra friction holding the drawers in could only be a good thing!
- To find where to drill the holes nearest to the REAR side of the desk, mark one hole 1 1/4” up from the bottom edge of the desk, and another hole 3 ½” up from the bottom edge. I made sure to align my holes so the arch would mount just in front of the little flip-up door, this way I could run a cable from the gap in the door right to the arch itself. Do the same on the other side of the desk as well. Pushing the holes in farther from the back side means the arch will not accidentally interfere with the hinged door that hides your power strip and 12V LED Driver.
- Use a 7/32nd inch drill bit to drill the 8 holes into the sides of the desk. I used this sized drill bit so the machine screws could be pressed through the hole, but have a little friction as well. This stops them from accidentally falling back into the desk when fitting the arch to it.
Attaching the Arch to the Desk
Now that your Arches are nice and dry it’s time to attach them to the desk itself…
- Put 1 washer onto each machine screw, and push the screw in through the inside of the desk, so the threaded ends of the screws are poking outwards. Placing too many washers onto the screw will cause the heads of the screws to interfere with the drawers.
- Starting with one side of one arch, push both screws through the drilled holes, and screw on a wing nut just enough so it doesn’t fall back off.
- Bend the opposite end of the arch so it will line up with the pair of holes diagonal to the starting holes (So If you attached the arch on the front-right, attach the opposite end to the back-left) screw on the wing nuts, alternating between which wing nut you are screwing in, until all are snug.
- Repeat with the other arch
- Feed a bolt up through the center hole of each Arch (You may need to push and pull the arches to get them to line up properly) and add a final wing nut
- Your Arch is now complete, and ready for lighting!
Testing the light strip before installing
Make sure to test all elements of the light strip prior to putting the whole thing together. If the system works in the beginning, but later on stops working, you will at least know it was something that YOU did, rather than something the manufacturer did!
- Take the spool of lights out of the static bag it comes in, and also unpack the remote dimmer, and the 12V driver as well.
- Plug the LED lights (Still on the spool!!!) into the 12V adapter. Then plug the adapter into the wall to check and make sure the light strips actually work! Do not leave them lit while on the spool longer than needed to check that they work though, as the excess heat may damage them!
- If the LED lights work by themselves, it’s time to test them along with the remote dimmer.
- Pull the small plastic tab out of the bottom of the remote to allow the battery inside to start working.
- Plug the lights (Still on the spool) into the remote dimmer adapter, then plug that adapter end into the 12V adapter. Then plug the driver into the wall.
- Push the red power button on the remote to test the light strip and the remotes functions. You will be able to turn the lights on/off, incrementally adjust the brightness, use preset brightness’s, and also adjust strobe modes and their strobing speeds.
Cutting and assembling the light strip
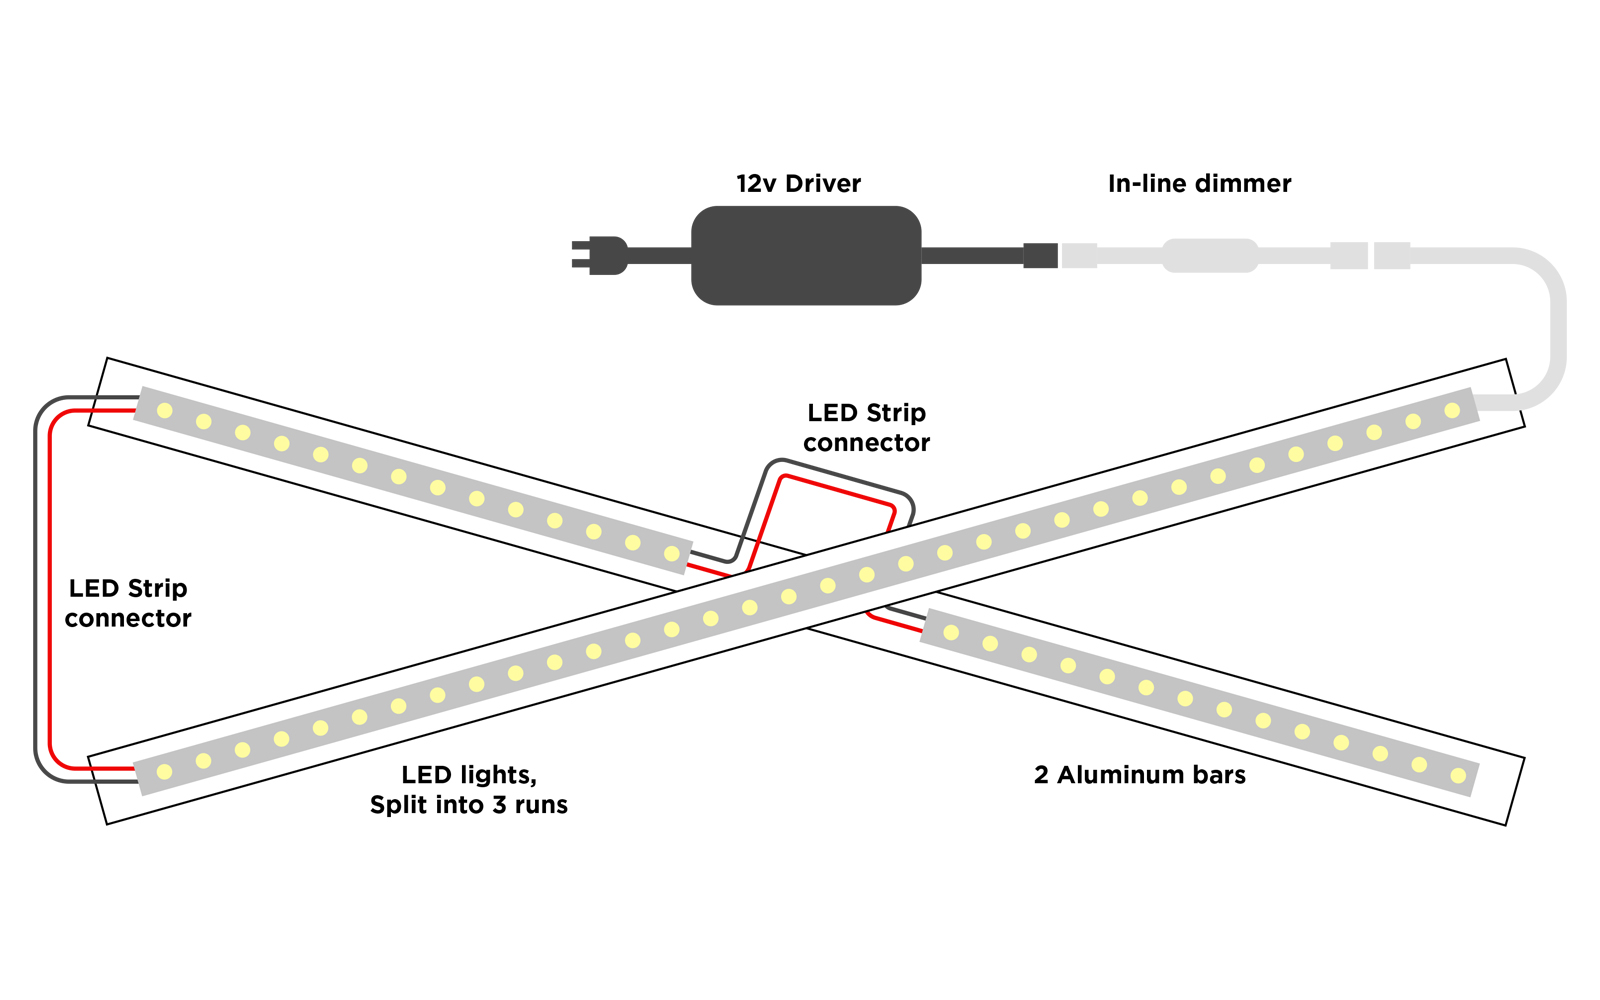
Now that the basic construction of the lights have been tested, it’s time to set them up in order to create the runs that will be mounted to the arches themselves.
- You will end up with three separate runs of lights. One long run will span one of the arches, while the other two runs will need to have a gap between them, so they can leave a gap where both aluminum bars are mounted together.
- The light strips are cuttable every 3”, right in the middle of the copper contact points. Cutting them anywhere else will kill that strip segment!!!
- There is no right or wrong length to cut these to, as the run lengths will depend on how tall you made your arch. Plus some people like to have LESS lights facing towards you when you sit down, since they light the back of the model you can’t see anyway, and shine right in your eyes!
- I tested my run lengths by using blue masking tape, and taping them into place temporarily every few inches. Although these lights include an adhesive backing, I wanted to save the sticky-ness for when I permanently affixed them into place.
- I started with the end of the LED strip which includes the power plug. I kept the plug-end at the back-right of the table, this would allow me the connect this strip end right to the driver for power, which is hidden in the back of the desk.
- Once I had this first strip length figured out, I cut it and moved on to figuring out the other strips.
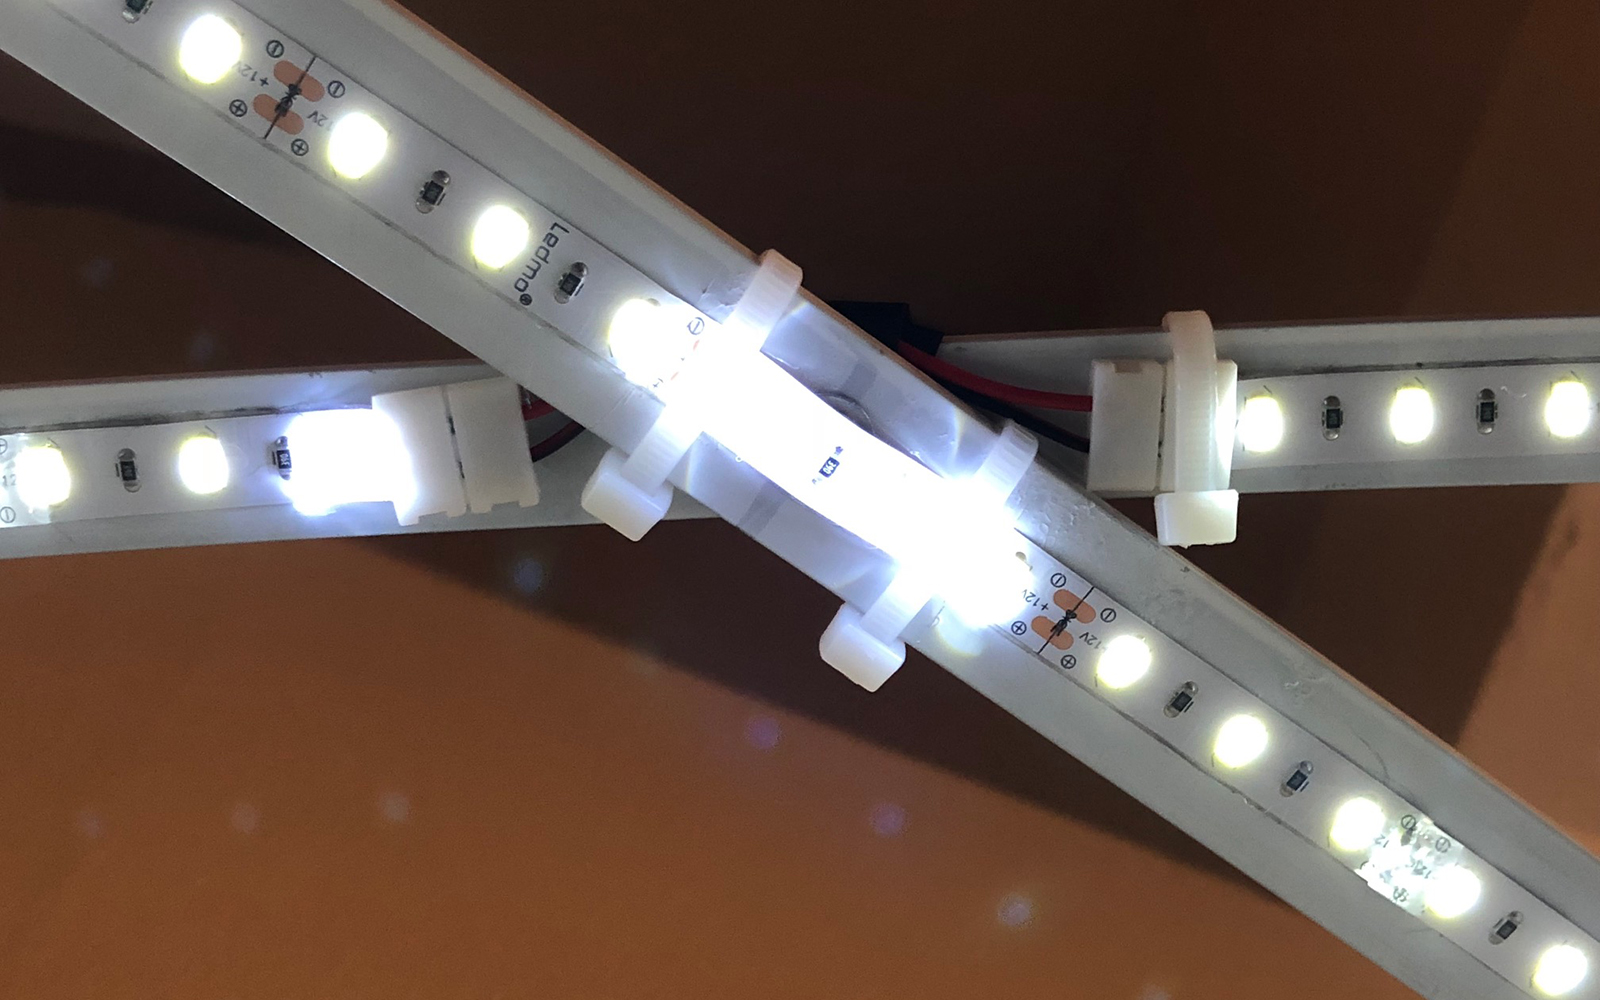
- Now that you have 3 runs of LED’s you will need to connect them together! You will use the “LED strip connectors” to connect one run to another. I chose these because I didn’t have a soldering iron with my at the time. You simply snap the ends closed on top of the bare copper contact points in order to link one LED run to another. Note that sometimes they do take a good bit of fiddling with to get right! This is where a multimeter definitely helps!
- You will need one set of strip connectors to bridge the gap at the peak of the arch, and another one to bridge two arch-bottoms together.
- Peel the adhesive backed protector off your first LED run, starting with the run that will be applied at the BACK-RIGHT hand side. This way once its plugged in you can momentarily turn your lights on while installing to make sure they work properly. This saved me as I had a lot of issues with connectivity of the middle run I installed, and would not have noticed the problem until everything was installed!
- Once all lights were installed and tested, I left them turned on as I added a few zip ties here and there to keep them from peeling off. Leaving them on during this helped me make sure I didn’t cause any shorts or accidentally disconnect any wires. I then used the Command Decorating clips to hold any rogue wires in place, like up under the desk.
And there you have it! Simple right?
Hope you found this tutorial useful and in the end, maybe it’ll look a lot like mine…
Awesome work! I’ve been checking here everyday since I saw your post on Instagram. I will definitely be building some rendition of this. Top notch. Keep it up!
Fantastic Rory! Good luck with the build!